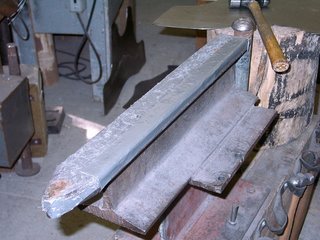

 An armourer's anvil is a bit specialized. It has to have sharp edges, rounded edges and be longer than the usual range of anvils. The metal is pretty thin by blacksmith standards, so it does not need to be nearly as heavy as a standard anvil. Some weight is needed though! A modified railroad track is pretty good. Because it is not made of hardened steel, it has to be dressed frequently. As usual, I lay on a nice thick layer of duct tape to protect the metal. I have to replace the duct tape from time to time or else the wrinkles in the duct tape will transfer to the surface of the steel! The top picture shows my homemade armourer's anvil, welded to a big old chunk of I beam, with a dishing stump (wooden anvil) acting as a counterweight. This set up is pretty much what you would find in most workshops of the Middle Ages.
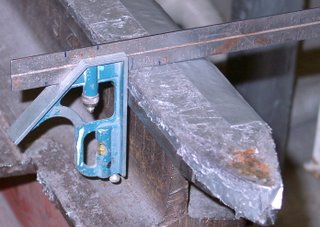
 You will notice from the second picture that the anvil is quite sharp on the left edge and nicely rounded on the right hand edge. It is bullnosed to a 3/8 inch radius. That bullnosed edge is the one I use here.
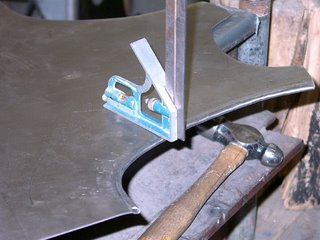
The edge of the steel backplate is placed over the rounded side of the anvil, and pushed down with a soft hammer. (lead is common, nowadays we use urethane faced hammers) Because I am an un-repentant steel man, I use my trusty ball peen for this job, and use care to avoid weird dents. This is the point where you should install a wire if you are going to do it. In this example, I have not bothered. When you are all done, top part of the workpiece is totally flat (as shown by the square). That is the part which goes to the inside of the armour, against the body. No sharp edges! The bottom picture shows the roll from the inside. Smooth as a baby's bottom...
A further step is often used in medieval armours, and that is to take a dull chisel, and tap in diagonal dents all along the edge of the roll to make it look like a twisted rope. That process is called "roping" and for some reason is considered to be very fancy. I consider roping to be remarkably easy (compared to this rolling part!) and a poor reason to double the price of an armour. But yes, it does "make" the job look finished all right! I'll leave baling and roping for you to figure out...grin!
2 comments:
Up to this point of my life, the most I knew about anvils were that they were supposed to be dropped on opponents -- courtesy of Bugs Bunny and all his Loony Tunes friends.
In other words, its very educational and I find it very interesting!
Stag, can you post a link to your website for your business? I want to take a gander at what you have again :D
www.southtower.on.ca
Post a Comment