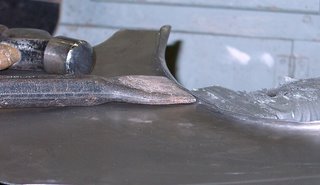

You can see the metal gets neatly curled over the mould. I am using a brick chisel here, but there are specialized tools which are often made by the blacksmith. Sometimes I use the wedge shaped end of a cross peen hammer if that is all I have at the time. The most important part of course is the ball peen hammer. It is hard to see in the illustration, but the hammer face has been sanded until it is slightly rounded, then buffed to a mirror finish. That is because any scratch or dent in the hammer will be transferred to the work piece. For a similar reason, the anvil is faced with duct tape to protect the work piece. (Polishing the anvil would take a long time, but know people who have done it!)
In my workshop, there is a big sign up saying "Use claw hammers to drive nails and punches....use ball peens to hit steel". The "peen" part of the hammer is what you use for this job...the "ball" part of the hammer is used to peen over rivets. This terminolgy makes more sense when you think of the whole hammer being called a "peen". I'm sure it comes from an Anglo-Saxon word which means "Lump-o-iron". Blacksmiths in their normal every day to day work use a hammer called a "cross peen" hammer that has a wedge on the back of it, the striking line of the wedge being 90 degrees to the handle. A "straight peen" hammer would have the wedge in line with the handle...rather like a stubby hatchet.
Claw hammers are for nails, usually they are much lighter, and you don't polish the faces...in fact, some claw hammers are intentionally scored to grip the nails. Often claw hammers have steel handles. I hate steel handles. I shape the handles to fit my hands with the belt sander.
So now you know all about hammers. Well, not ALL about hammers, but enough to know that if you talk to an armourer about the most common tool of his trade, you will know that the armourer is the one with the balls....
No comments:
Post a Comment